
I wanted to give OpenClaw its own mailbox in Microsoft 365 so it could read mail, send messages, and generally act like a useful automation agent without piggybacking on my personal account. The trick was doing it in a way that was secure, auditable, and constrained.
After working through the options, I landed on a model that I think is the right fit for this kind of use case:
This post walks through that setup and the reasoning behind it.
When you first start thinking about “mailbox for an agent,” there are three obvious Exchange object types that come to mind:
A room mailbox is the wrong object type. It exists for scheduling resources, not for autonomous mail handling.
A regular user mailbox is the easiest thing to understand because it behaves like a normal account. But it usually means consuming a license and it encourages the wrong authentication pattern: acting like a person signed in to Outlook.
A shared mailbox turned out to be the better fit.
It gave me:
That last point is what really matters. I did not want an automation agent depending on stored user credentials.
Here is the model I ended up with:
Shared mailbox
This is the mailbox identity, such as agent@yourdomain.com.
Entra app registration
This is the application identity OpenClaw uses to authenticate.
Certificate credential
This is the app credential. No client secret, no password, no interactive user login. The alternative was setting up OIDC, but that’s a bit more complicated than I thought the situation warranted.
Exchange RBAC for Applications
This limits what the app can do in Exchange and which mailbox it can touch.
Transport rules
These are the hard backstop for outbound email restrictions.
That split matters because mailbox access and outbound delivery control are not the same thing.
The app needs to be allowed to act on the mailbox, but even after that I still want Exchange itself deciding who that mailbox is allowed to send to.
If you have been reading older Microsoft 365 blog posts, you have probably seen advice that looks like this:
Mail.ReadWrite and Mail.SendThat was the older pattern.
The newer model is Exchange RBAC for Applications. Microsoft is replacing Application Access Policies with this RBAC-based approach, so it makes more sense to start there instead of building on the legacy model and migrating later.
The important idea is that Exchange Online can now express:
That is exactly what I wanted.
With all that context in mind, here are the steps for setting things up.
In Exchange Admin Center:
agent@yourdomain.comYou do not need to enable direct sign-in for the mailbox. In fact, the whole point of this design is to avoid signing in to the mailbox as if it were a person.
In Microsoft Entra admin center:
After you create it, note these values:
Later on, you will also need the Enterprise Application object ID, which is not the same thing as the app registration object ID.
That distinction matters more than it should, and it is easy to get wrong. Thanks once again to Microsoft for making the naming and IDs in Entra endlessly confusing.
For an unattended service, I strongly prefer certificate-based auth over a client secret. Although I didn’t store the certificate in Key Vault for this deployment, you could certainly do so if you’re running your OpenClaw VM in Azure.
On the OpenClaw host, I created a self-signed certificate with OpenSSL:
mkdir -p state/m365
openssl req -x509 -newkey rsa:4096 -sha256 -days 365 -nodes \
  -subj "/CN=OpenClaw Shared Mailbox App" \
  -keyout state/m365/openclaw-mail.key \
  -out state/m365/openclaw-mail.crt

openssl pkcs12 -export \
  -out state/m365/openclaw-mail.pfx \
  -inkey state/m365/openclaw-mail.key \
  -in state/m365/openclaw-mail.crt

chmod 600 state/m365/openclaw-mail.*
Then I uploaded the public certificate (openclaw-mail.crt) to the app registration under Certificates & secrets.
The private key stayed only on the host running OpenClaw. Make sure you’ve set permissions appropriately for the private key, I put it in the home directory used by OpenClaw.
When you use Exchange RBAC for Applications, Exchange wants a reference to the Enterprise Application service principal, which is not the object ID from the App Registrations blade.
So in Entra:
You now need three IDs in hand:
In Exchange Online PowerShell:
Connect-ExchangeOnline

New-ServicePrincipal \
  -AppId "<CLIENT_ID>" \
  -ObjectId "<ENTERPRISE_APP_OBJECT_ID>" \
  -DisplayName "OpenClaw Shared Mailbox App"
This creates the Exchange-side reference to the Entra app.
I wanted the app to access only one mailbox, not every mailbox in the tenant.
The cleanest way I found was:
For example:
Set-Mailbox agent@yourdomain.com -CustomAttribute15 "OpenClawMailbox"

New-ManagementScope \
  -Name "OpenClaw Shared Mailbox Scope" \
  -RecipientRestrictionFilter "CustomAttribute15 -eq 'OpenClawMailbox'"
Using a custom attribute makes the scope explicit and easy to reason about later.
The mailbox roles I needed were:
Application Mail.ReadWriteApplication Mail.SendTo assign them:
New-ManagementRoleAssignment \
  -Name "OpenClaw Mail ReadWrite" \
  -Role "Application Mail.ReadWrite" \
  -App "<CLIENT_ID>" \
  -CustomResourceScope "OpenClaw Shared Mailbox Scope"

New-ManagementRoleAssignment \
  -Name "OpenClaw Mail Send" \
  -Role "Application Mail.Send" \
  -App "<CLIENT_ID>" \
  -CustomResourceScope "OpenClaw Shared Mailbox Scope"
If you want calendar access as well, you can add an Exchange application calendar role later. I would not pre-grant more than you actually need.
Before wiring anything into OpenClaw, I wanted to know whether Exchange understood the scope correctly.
Test-ServicePrincipalAuthorization \
  -Identity "<CLIENT_ID>" \
  -Resource agent@yourdomain.com
And just as importantly, test a mailbox it should not have access to:
Test-ServicePrincipalAuthorization \
  -Identity "<CLIENT_ID>" \
  -Resource someoneelse@yourdomain.com
That negative test is worth doing.
On the OpenClaw side, I stored mailbox metadata and certificate material locally, something like this:
{
  "tenantId": "YOUR_TENANT_ID",
  "clientId": "YOUR_CLIENT_ID",
  "mailbox": "agent@yourdomain.com",
  "certPath": "state/m365/openclaw-mail.pfx"
}
Then I asked OpenClaw to build a small helper script that:
https://login.microsoftonline.com/<tenant>/oauth2/v2.0/tokenThe important Graph call for mailbox reads looks like this:
GET /v1.0/users/agent@yourdomain.com/mailFolders/inbox/messages
And for sending:
POST /v1.0/users/agent@yourdomain.com/sendMail
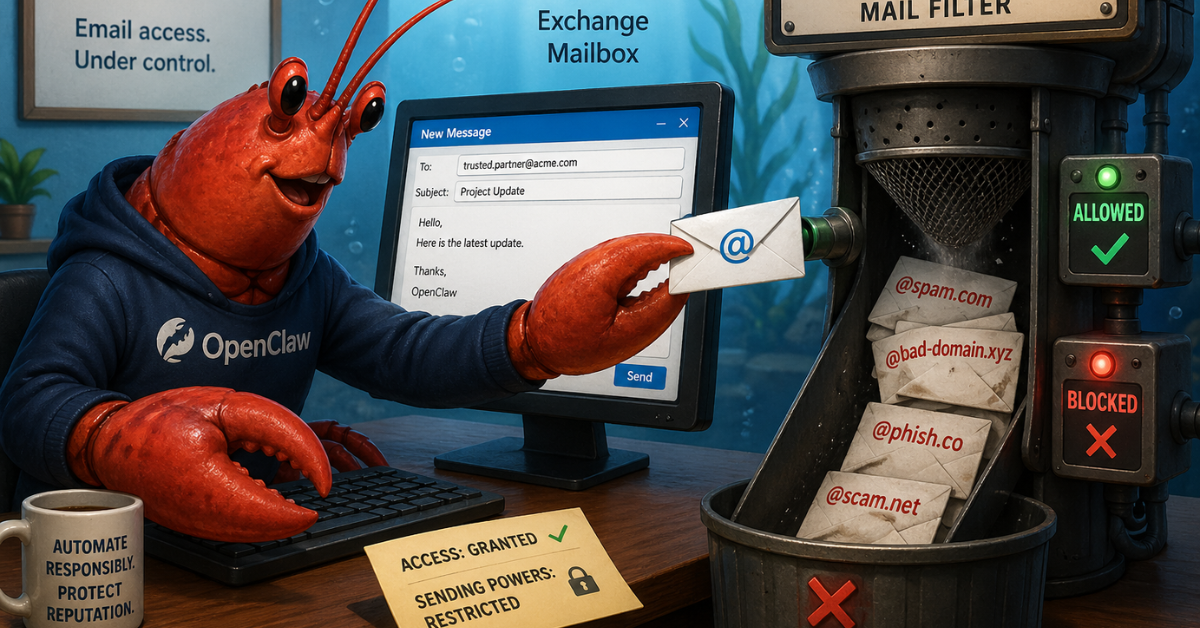
With the Exchange RBAC setup in place, OpenClaw was able to read from and send as the shared mailbox without any delegated user login.
Mailbox access is only half the problem. The other half is making sure the mailbox cannot blast mail anywhere it wants.
For that, I used an Exchange transport rule.
The pattern is simple:
This gives you a genuinely useful second line of defense.
Even if the agent tries to send to someone it should not, Exchange will stop the message.
I also added a second action that sent a notification to me if OpenClaw tried to send to a non-approved address. If OpenClaw suddenly starts spamming hundreds of people with a Nigerian Prince scam, I want to know even if the emails are all bounced by the transport rule.
For the approved recipients, I created an Exchange group and added contact and users to it that I wanted OpenClaw to be able to contact. That makes it easy for me to update the allowed recipients without altering the transport rule each time. It also lets OpenClaw due a pre-flight check, as we’ll see shortly.
One behavior surprised me a little, but it makes sense once you see it.
When I sent mail through Microsoft Graph to a blocked external recipient:
sendMail submissionIn other words, submission success is not the same as delivery success.
That is an important operational detail if you plan to automate around this.
Do not treat “message exists in Sent Items” as proof that the message was delivered.
Transport rules are the hard enforcement layer, but I also wanted OpenClaw to do a quick preflight recipient check before it even tried to send.
For that, I created a mail-enabled group containing the approved recipients, something like:
openclawallowed@yourdomain.com
Then OpenClaw reads the members of that group and refuses to send if any requested recipient is not in the allowlist.
That sounds straightforward, but it required one more set of permissions.
Mailbox permissions and directory permissions live in different planes.
Exchange RBAC for Applications gave the app mailbox access, but it did not give the app permission to read Entra group membership.
To make the allowlist group readable, I had to add Microsoft Graph application permissions.
The smallest set that worked in my test case was:
GroupMember.Read.AllGroup.Read.AllUser.ReadBasic.AllOrgContact.Read.AllWhy all four?
Because the group could contain:
GroupMember.Read.All let me enumerate the members, but I initially only got object IDs and types back, with the useful fields set to null. The additional permissions were needed to resolve those member objects into usable addresses.
That let me build a safe wrapper around the raw send path:
I still kept the Exchange transport rule in place.
That is the right split of responsibilities:
Group membership check = convenience and fast feedback
Transport rule = actual enforcement boundary
This setup gave me a few properties I care about a lot:
It is more work than creating a licensed mailbox and signing in like a user, but I think it is the right kind of work.
It moves the design away from “pretend this automation is a person” and toward “treat this automation like a service with explicit permissions and guardrails.”
I’m trying to adopt OpenClaw slowly and deliberately. As I grant it access and add functionality, I’m trying to keep with the principle of least privilege and have active reporting going back to me when it starts acting hinky. Giving OpenClaw access to send mail as me is a step too far, but giving it a tightly controlled mailbox allows me to set up mail-based workflows without having to worry about it abusing that power.
May 23, 2026

May 4, 2026


